Scheduling a game is important to ensure that the zone14 camera records the game. Here is a simple guide to scheduling a game on the Replay website and on YouTube.
1. Log in to the zone14 REPLAY page with your login details.
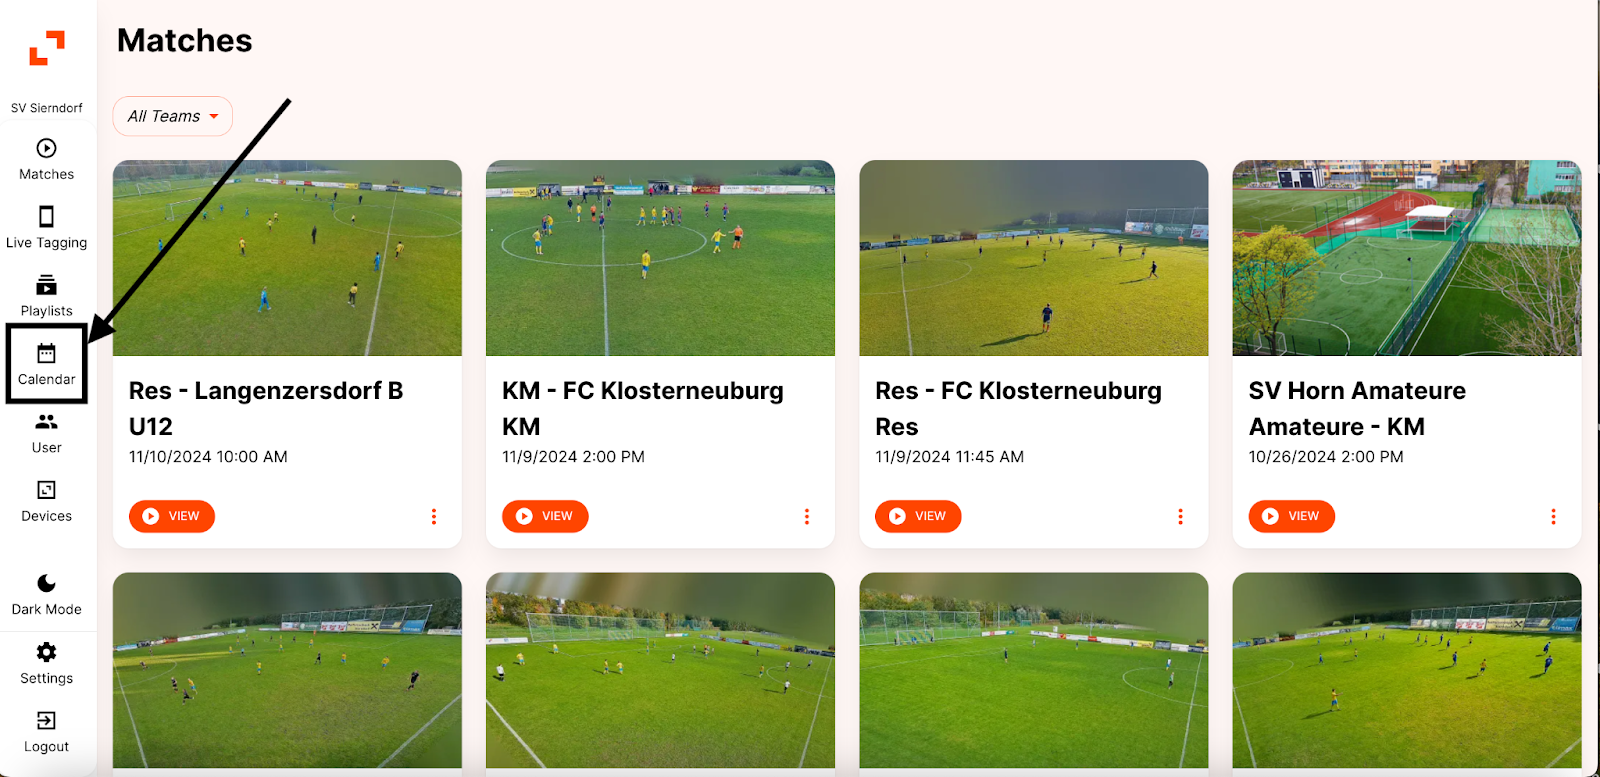
On your club’s homepage, locate the toolbar on the left side, just below the orange zone14 logo at the top. Find and click the “Calendar” button.
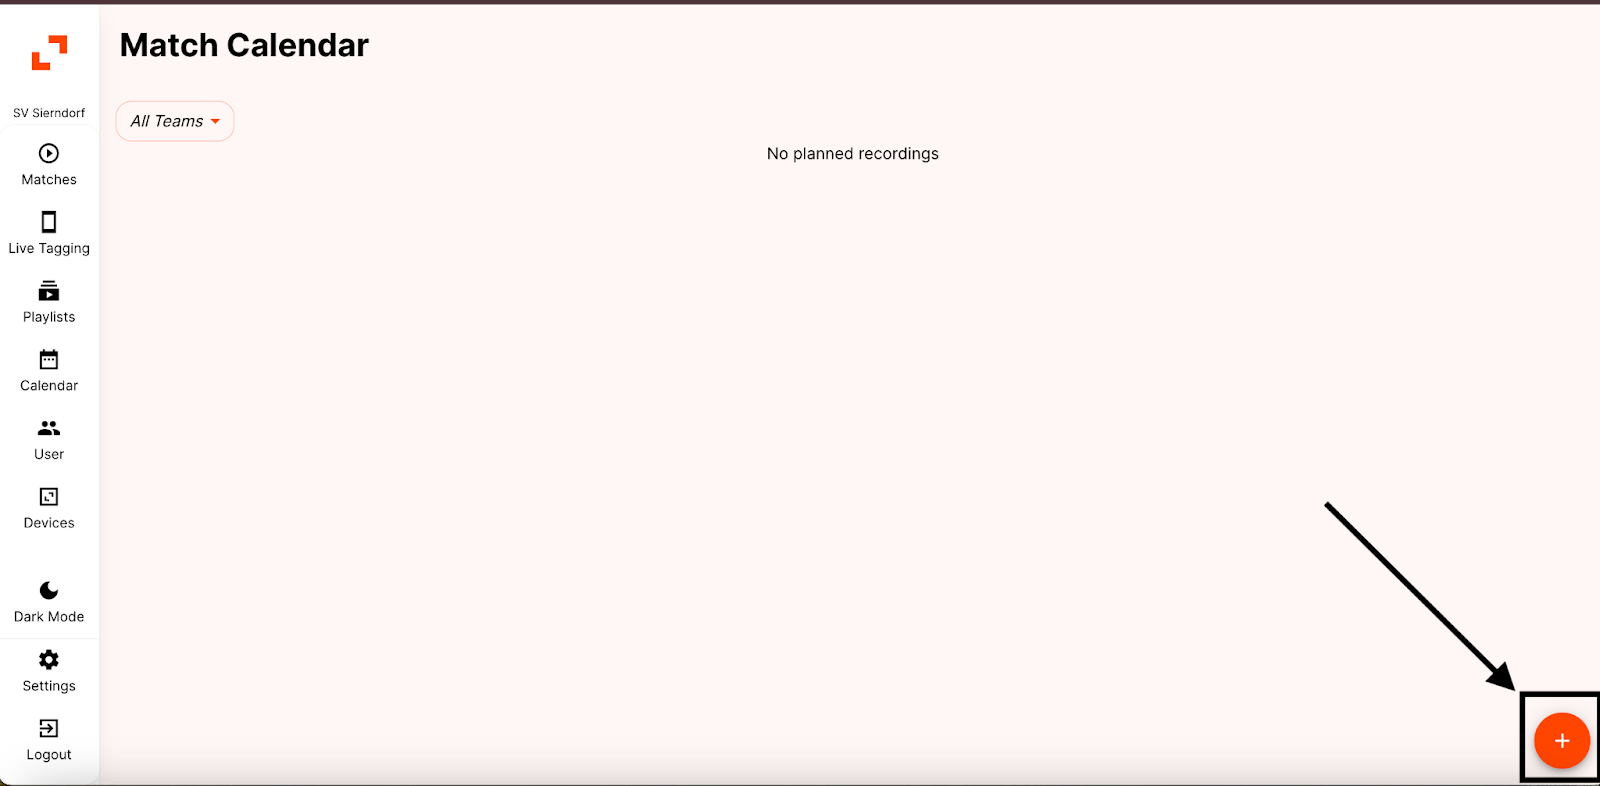
3. On the calendar page, click on the orange ‘+’ sign at the bottom right of the screen.
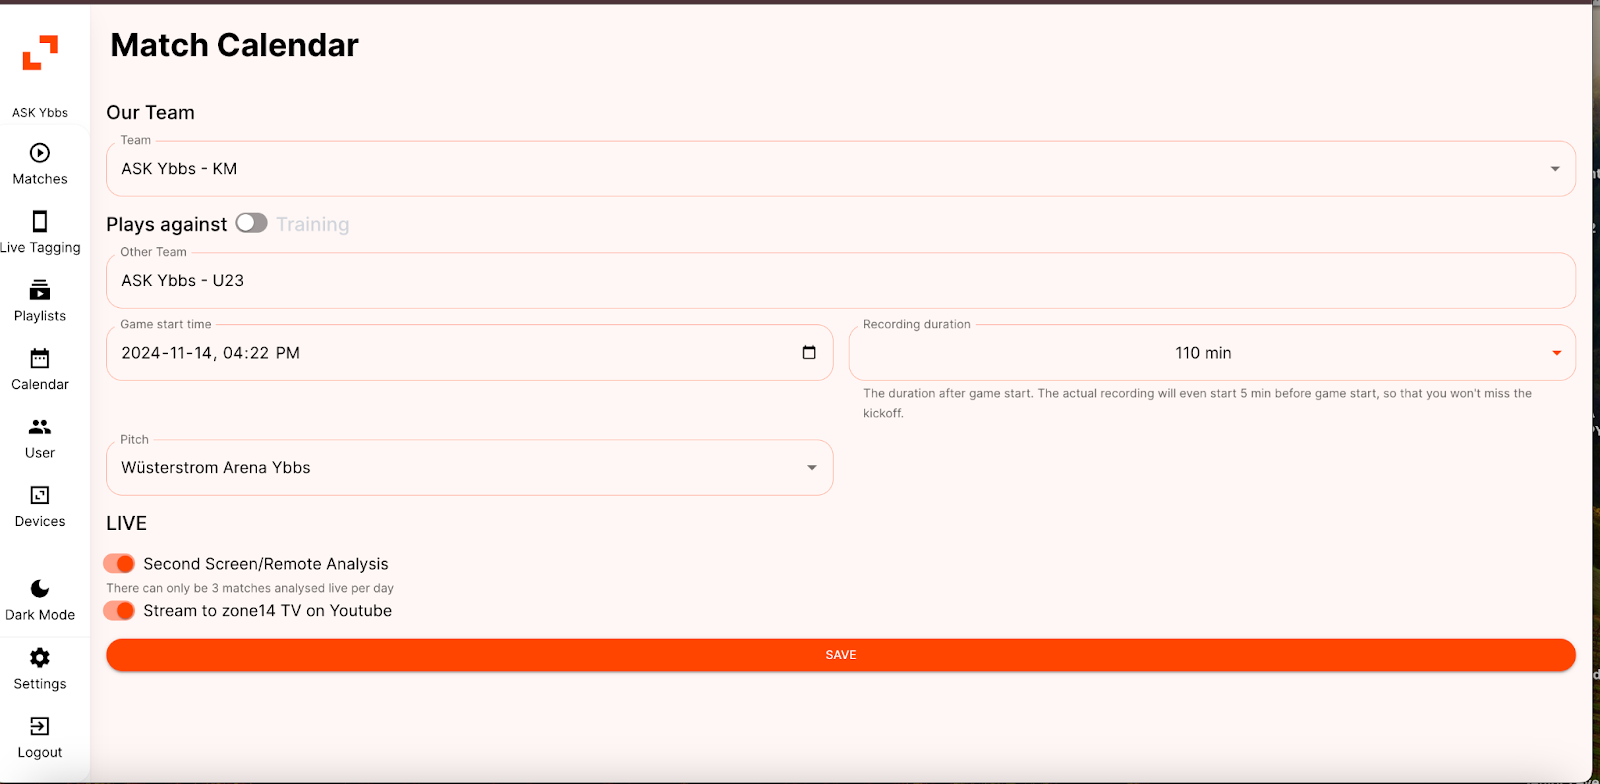
4. Several sections are now displayed from which you can select.
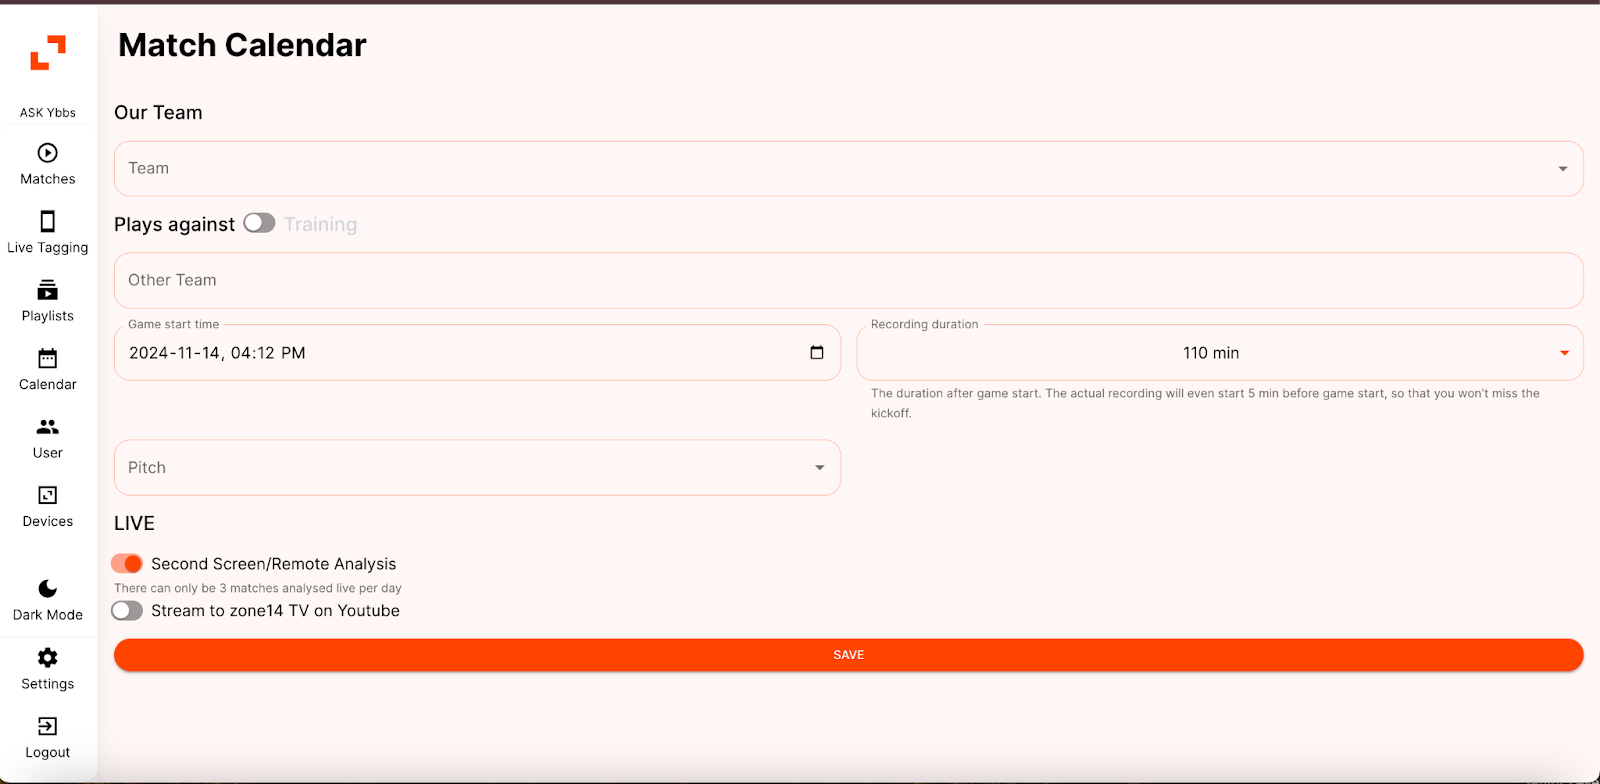
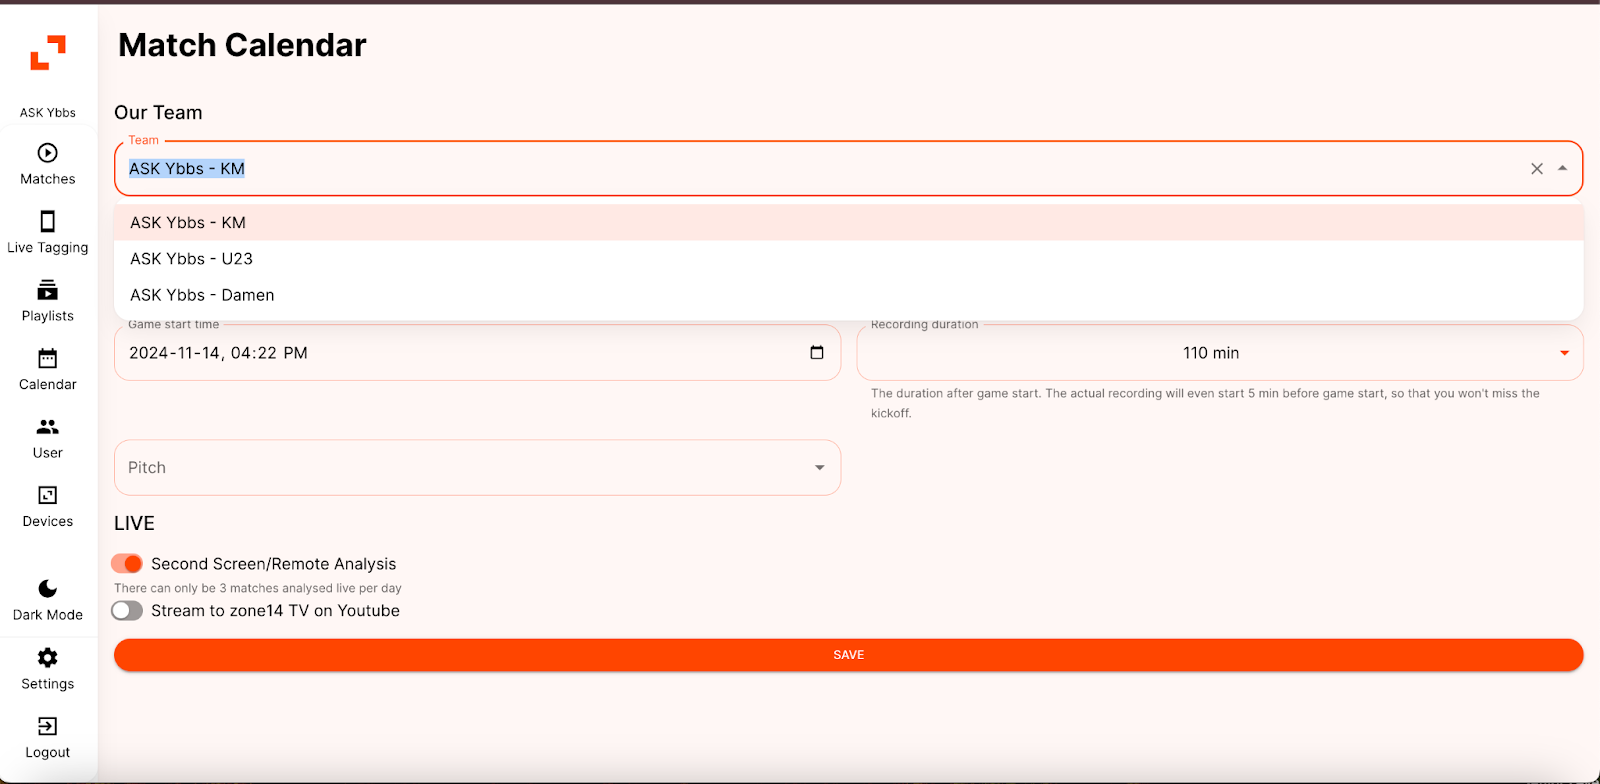
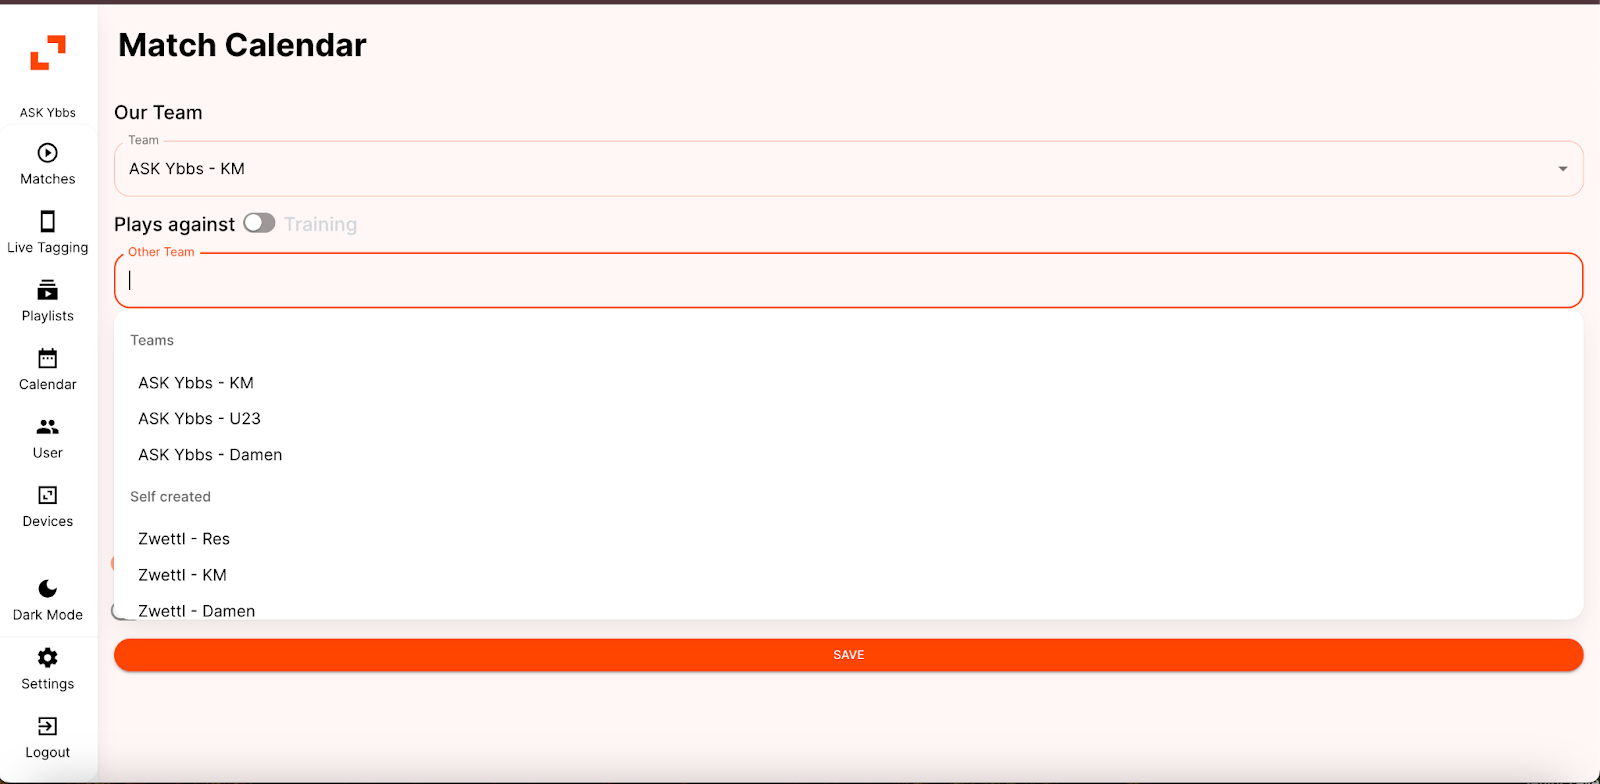
5. First select the team for which a match recording is to be planned under ‘Our team’.
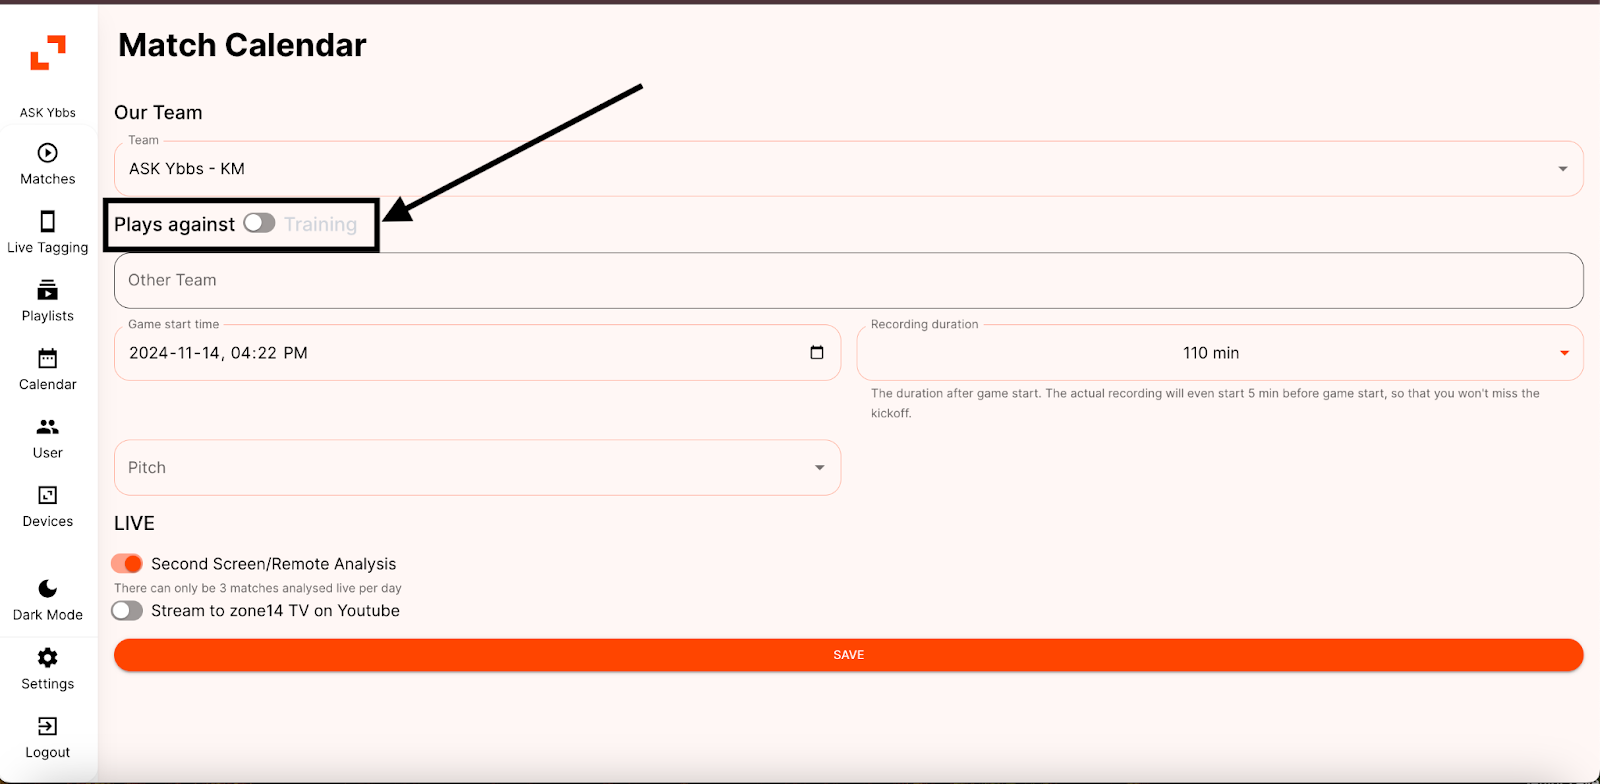
6. Next, under ‘Games against’, find the ‘Training’ button. If it is a training session and not a game, click on this button. Otherwise, go to the next step.
7. Select the team to be played against under ‘Other team’.
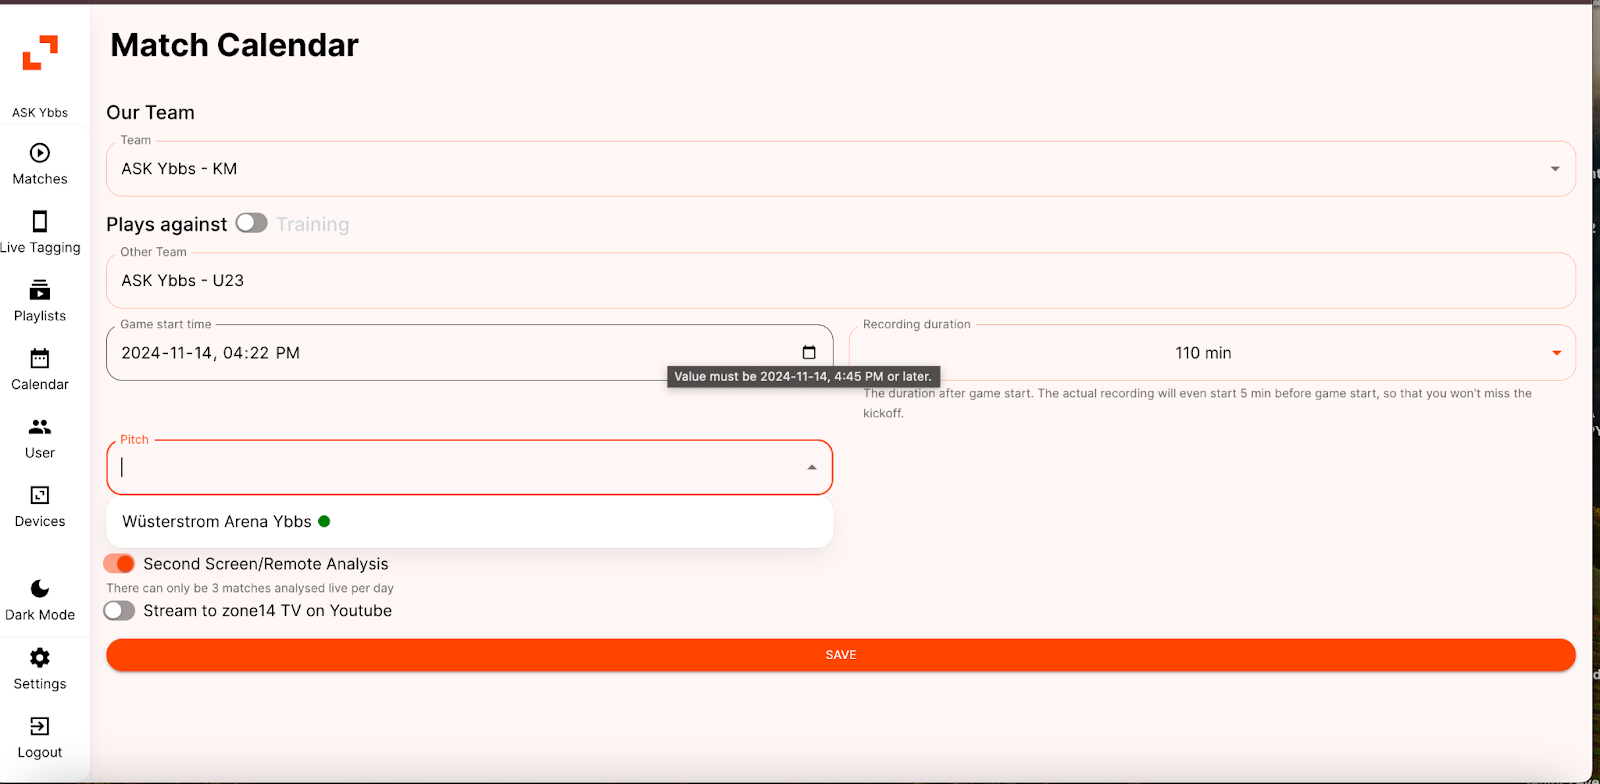
8. Under ‘Game start time’, click on the calendar icon on the right-hand side to select the date and time according to your requirements.
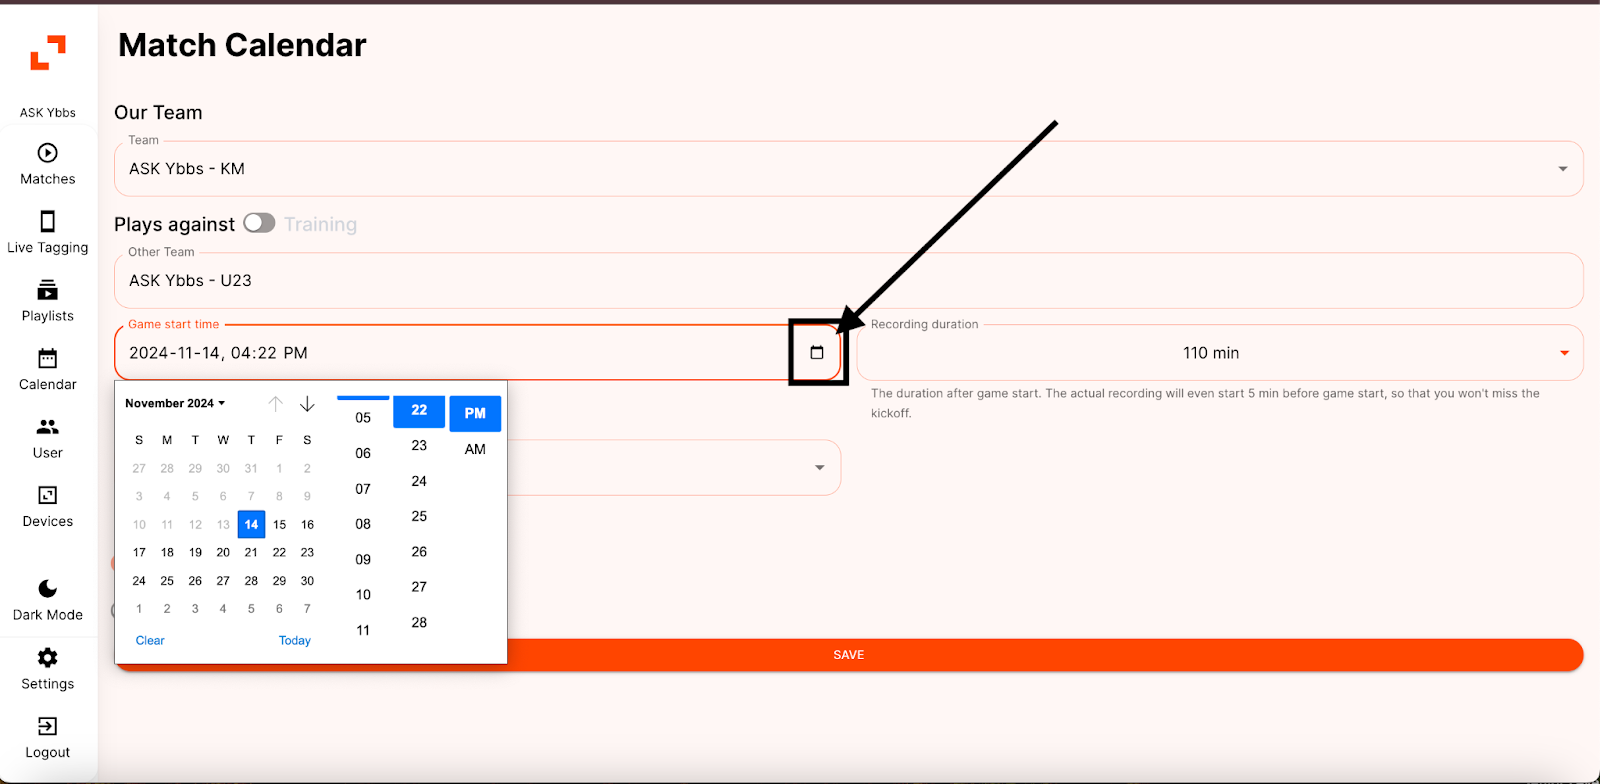
9. Under ‘Recording duration’, select an option between 30 and 160 minutes that best meets your requirements.
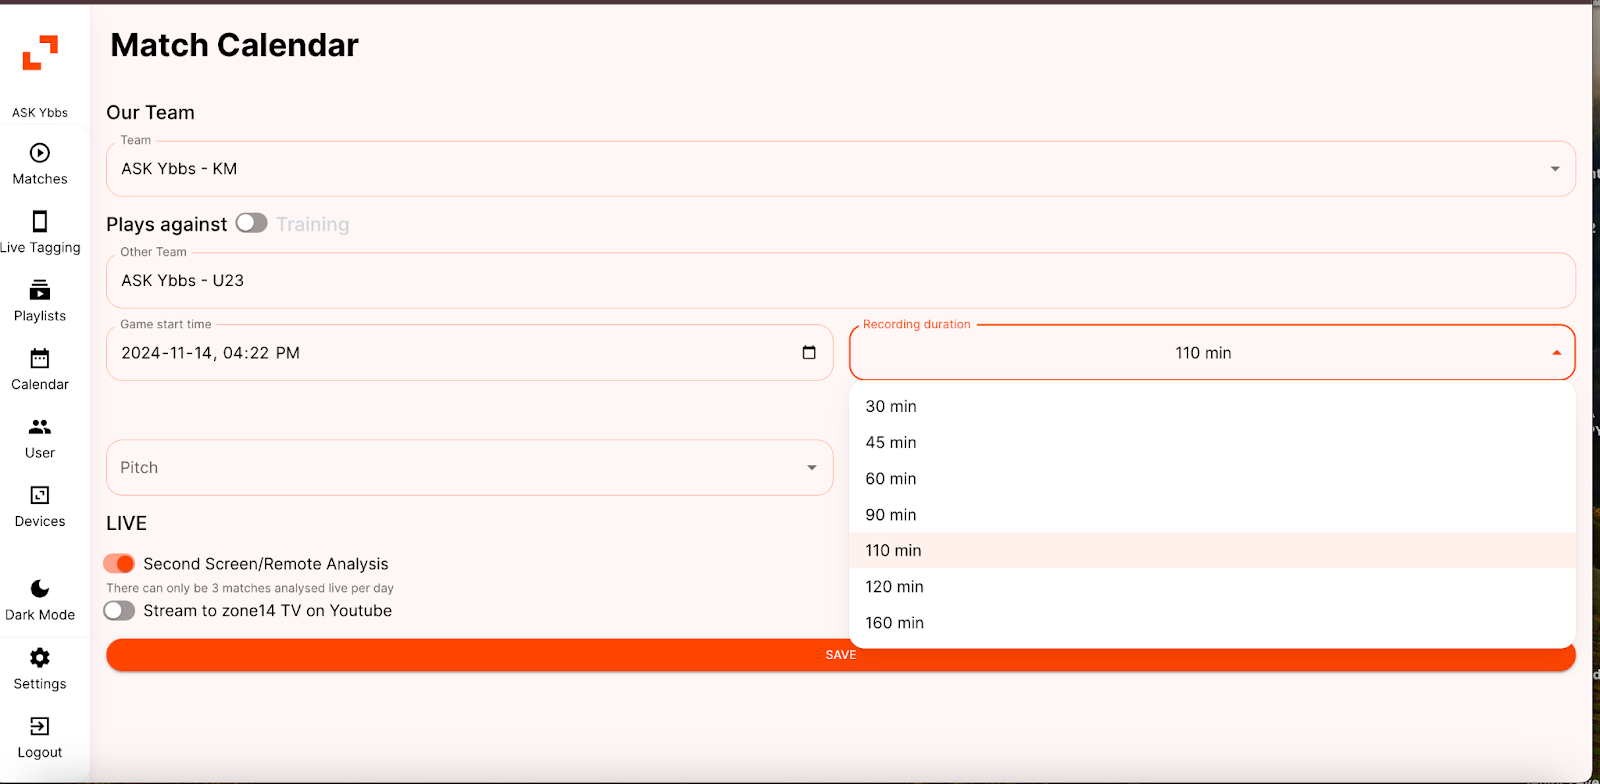
10. Select the pitch where the recording is to take place.
11. Two options are available in the ‘LIVE’ section:
- To stream the game live on both the zone14 TV YouTube channel and on REPLAY, select ‘Second Screen/Remote Analysis’ and ‘Stream on zone14 TV on YouTube’. This will stream the game on both platforms.
- If streaming on both platforms is not desired, simply continue with the next step.
12. Finally, click on ‘Save’. The game will then appear on the ‘Match calendar’ tab in the planned position.
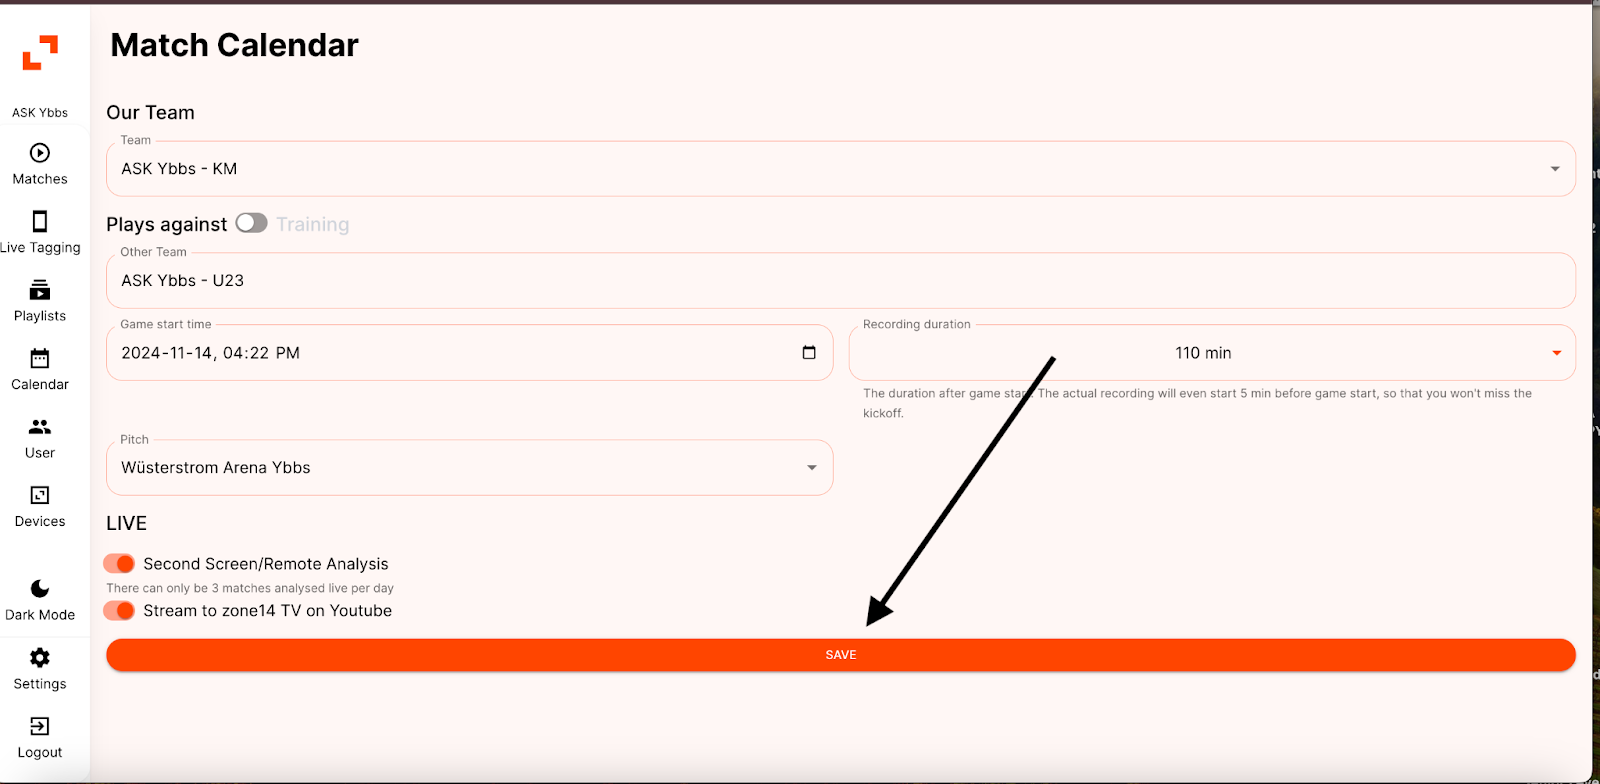
And that's it - the game is now planned and entered in the match calendar!
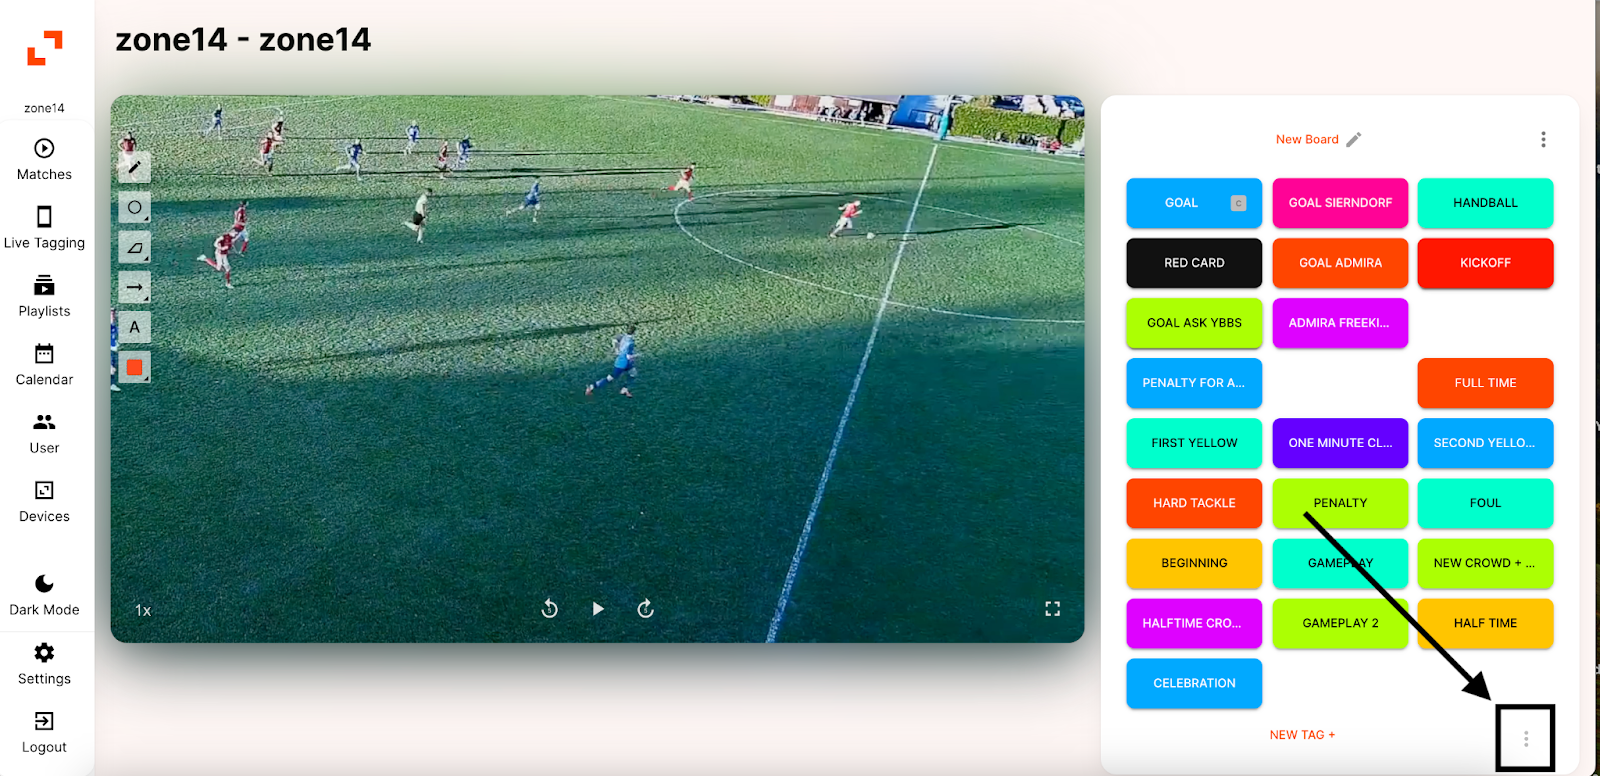
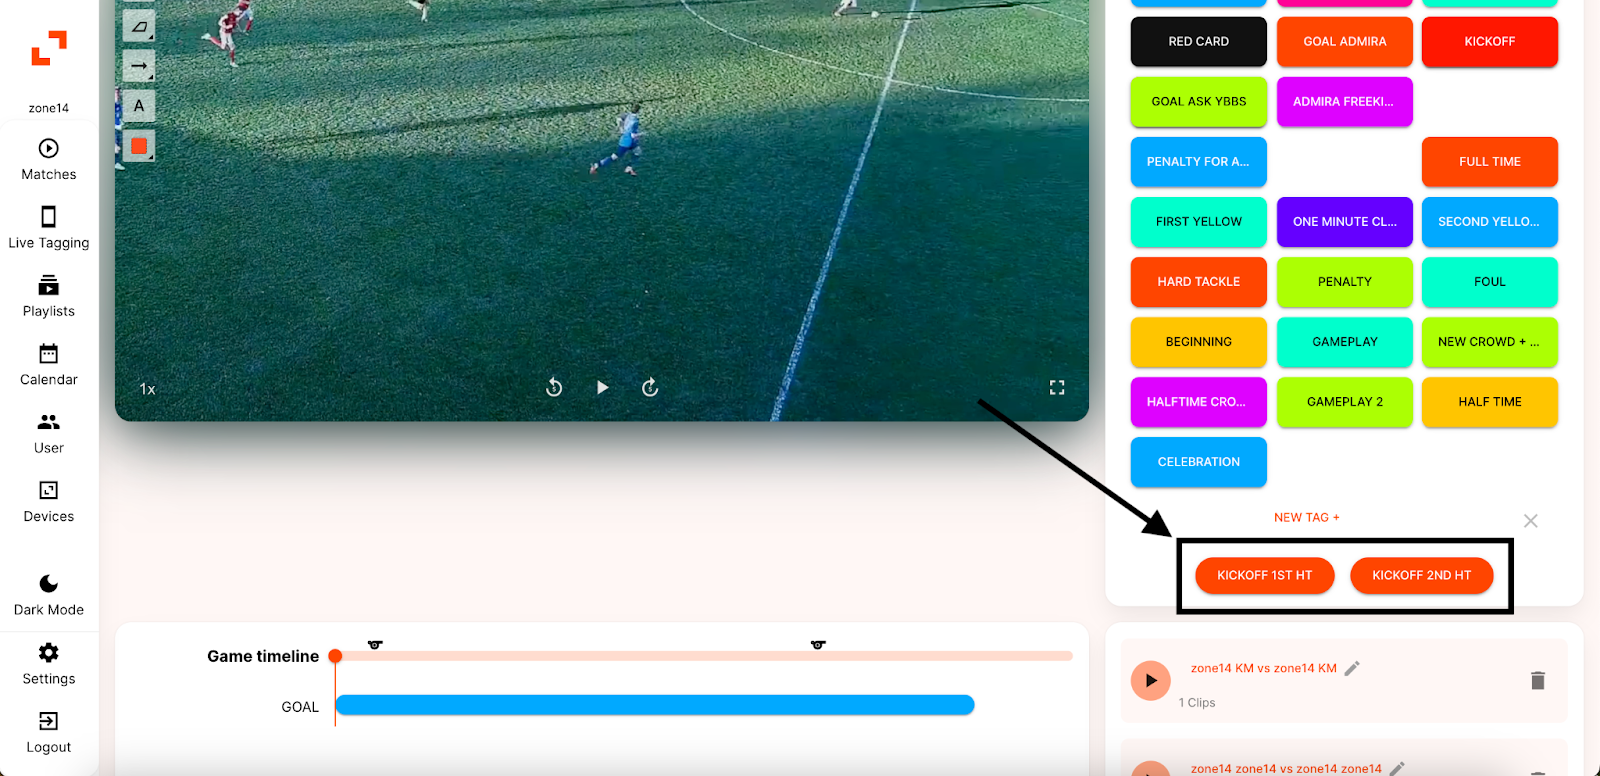 Next, go to the game timeline. Use the cursor to navigate to the point where the first half starts, then click the “KICKOFF 1ST HT” button you located earlier. Repeat this process to mark the start of the second half by clicking “KICKOFF 2ND HT.”
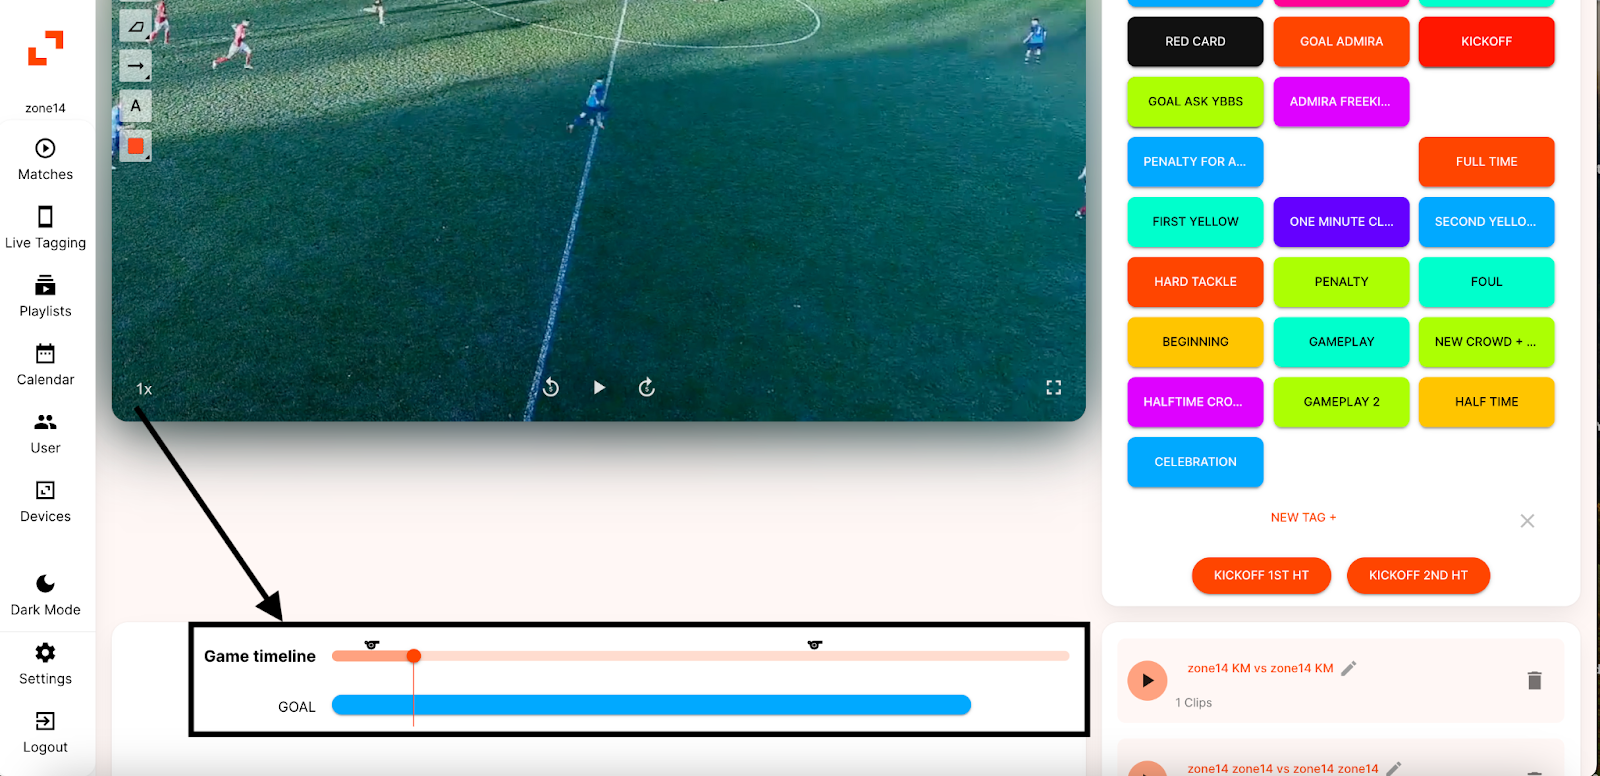 That’s it! We hope this guide helped you navigate marking the first and second halves.
 Now, on the Settings page, you’ll see two sections labeled “General” and “Theme.” Under the Theme section, you will see “Theme Variant” and “Accent Colour.”
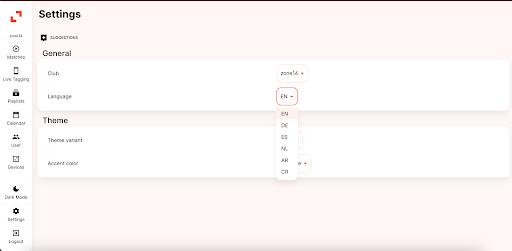
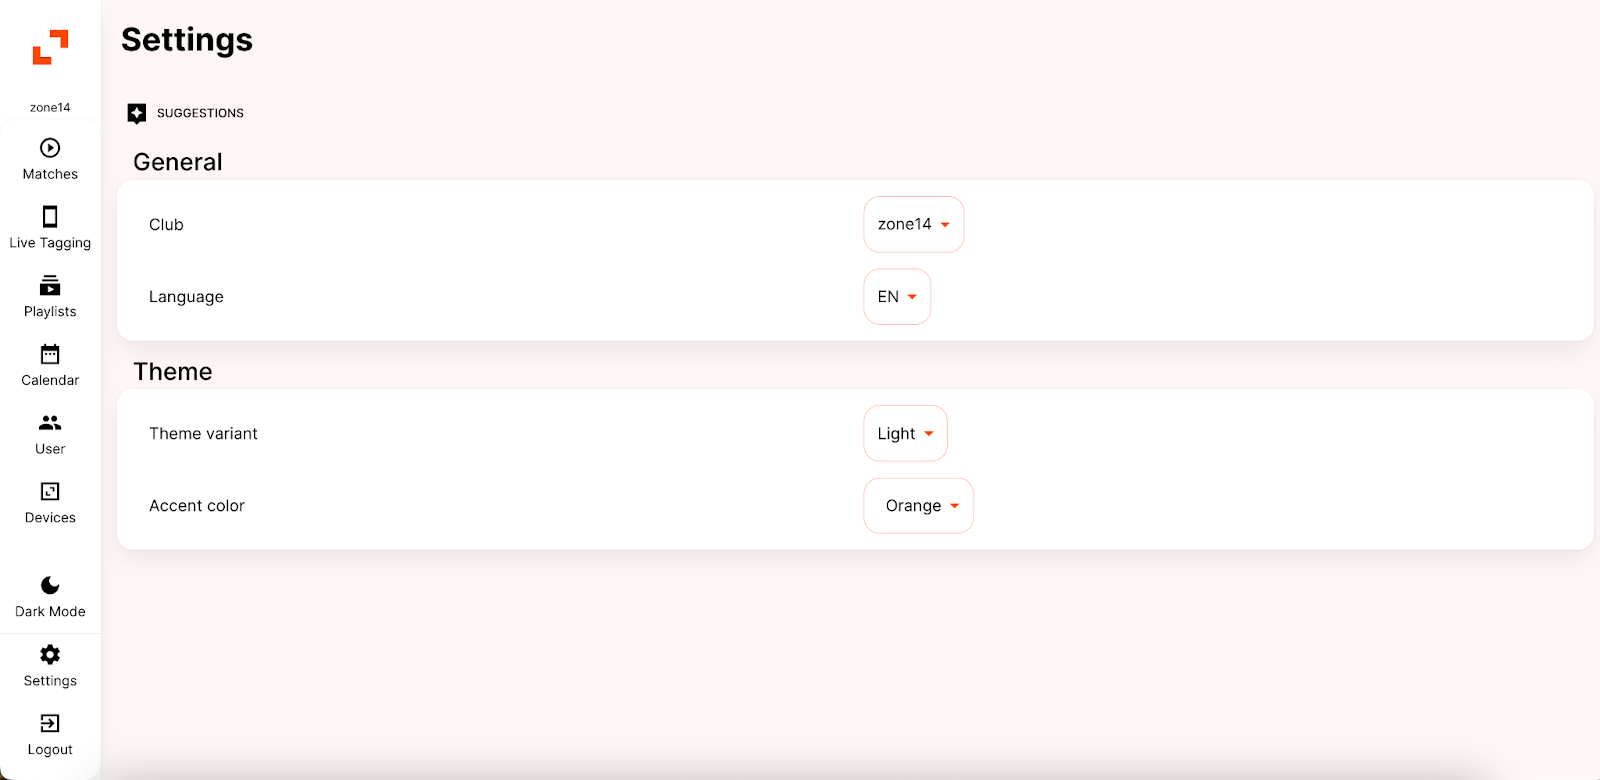 4. Das Dropdown-Menü der Themenvariante bietet zwei Optionen: „Hell“ und „Dunkel“. Standardmäßig ist das Thema auf „Hell“ eingestellt. Wenn die Standardeinstellung zu hell wirkt, kann zum Thema „Dunkel“ gewechselt werden, um ein dunkleres und angenehmeres Seherlebnis zu schaffen.Ein Screenshot zeigt, wie die Replay-App mit dieser Einstellung aussehen wird.
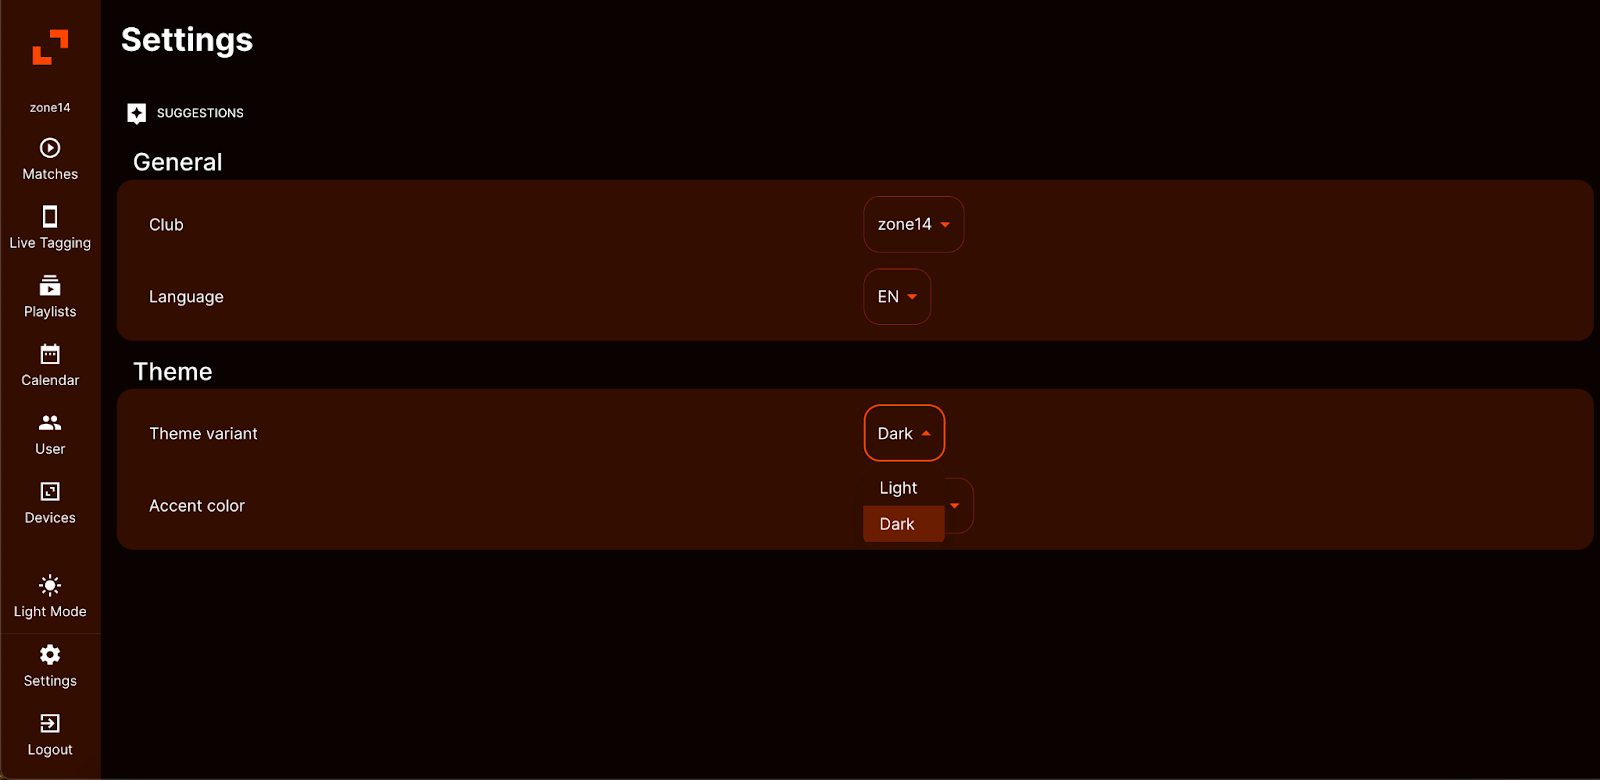 Next, let’s take a look at the “Accent Color” option. This feature allows you to personalize elements of the platform, such as the boxes and overall layout. A wide range of colors is available to choose from, as shown in the following screenshot. In this example, the accent colour has been changed to pink.
 If you spot anything that stands out or seems missing on the REPLAY platform, you can share your suggestions with zone14. Simply click the icon next to the “Suggestions” title to provide your feedback.
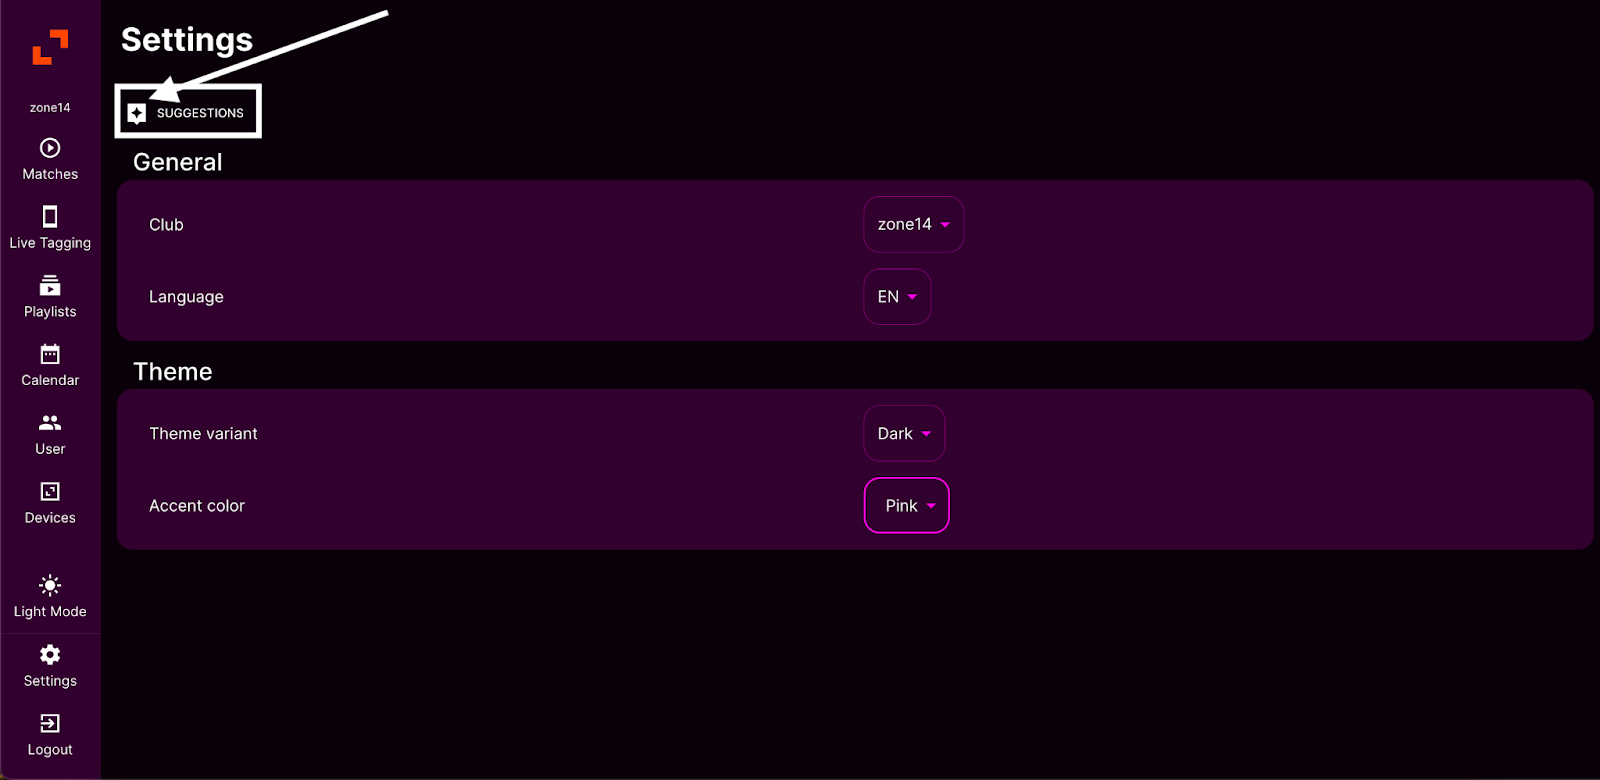 When you click the “Suggestion” icon, a window will appear. Enter a title for your suggestion in the “Title” box and provide more details about what you would like to see implemented. Once done, click “Submit your feedback,” and your suggestion will be submitted to zone14.
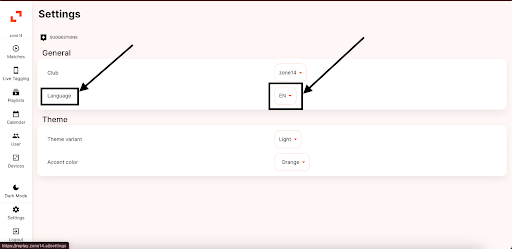
 2. Once you’re on your club’s homepage, look for a “+” sign and click on it. If it’s not visible because of the number of matches, you may need to scroll all the way down.
 3. After clicking the “+” sign, a window will appear. You’ll need to select the “Home” and “Away” team, and if necessary, schedule the date and time of your match.
 Next, press the button next to “Upload to the cloud.” This will reveal the option to “Upload via URL.”
 5. Click the “Upload via URL” button and paste the match link provided to you or one you’ve obtained yourself
 6. After posting the link, click the small “upload” button.
 7. Finally, select the option that says “I allow zone14 to directly download and process my recording.” Once you do that, you’ll be able to click the save button.
 8. That’s it! You’ll be taken back to your club’s homepage where you can access your match.


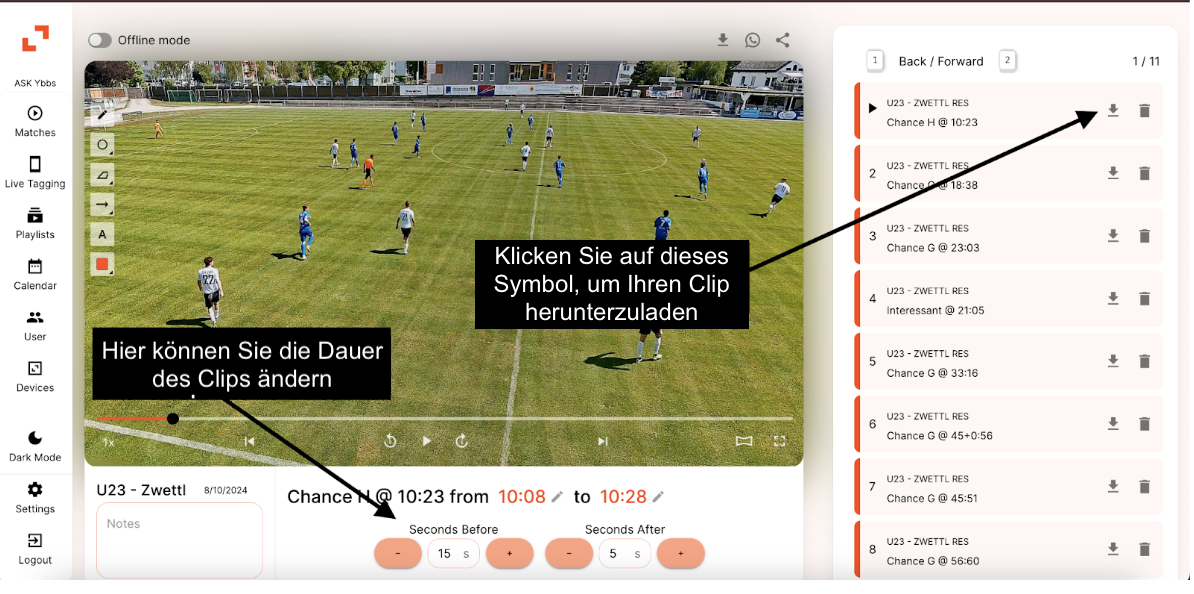 Once you have downloaded all the clips, you can organise them in a folder to make your work easier. If not, you can proceed to the next step.